
Sweet "Chawanmushi"

Before you read on, I should give you fair warning – this is a slighhtttly self-absorbed post, as I talk about this unnecessarily fancy dinner I cooked for my family a few weeks ago. Now before you think I’m this filial Asian son who often cooks for his parents though, this dinner was really more of a one-off thing to prove to them that I can actually cook. Just kidding, I actually did it to vie for the position of favourite child. 😉 (Your move, little siblings.)
But really, the main reason I'm sharing about this dinner is because I made something that was unexpectedly good! But since I have a knack for going off on a tangent, lemme tell you ALL about the dinner first. (Skip to the recipe if you can't stand slightly-narcissistic me. Heh.)
Now I've always shied away from calling myself a chef, or even a cook for that matter. (I'm really not, especially when compared to other, actual chefs out there who are actually mad-skilled and who crush the line every day.) But after seeing how well this dinner went down, I can't help but feel a slight bit cheffy, and majorly chuffed too.
Of course, being a fancy-shmancy dinner, I had to go all out and have a running theme to tie all the dishes together. So I came up with the terribly-titled theme of "Japanese-y", or "Japanese, but not really". Horrible title, I know. But I chose it because i) I don't actually know how to cook proper, traditional Japanese food, and ii) even if I did, my haphazard style of cooking will have me end up with dishes that aren't truly Japanese anyway.
It was a 5-course dinner, with each dish having some tentative link to Japanese food, but not enough to call it truly Japanese. I swear if real chefs were to read through this, they'd be shaking their heads in disapproval. But if anything, I think this is pretty true to my weird af thought-process when it comes to cooking and creating dishes, and I had plenty of fun with it, and that’s what matter the most, no? (Gosh I’ve gone soft.)
So here are the 5 dishes I made:
Tsukemono (a.k.a. Japanese pickles)
This was really just six random pickles I made, none of them exactly in the style of a traditional Japanese pickle. (Don’t shoot me.) I wrote about them in this pickle post from a few weeks back.
Mushroom Tempura
This was not really just a mushroom tempura, because there were 4 different types of mushrooms each cooked differently (mostly enoki tempura, but also pickled maitake, raw eryngii, and a seared shroom that I don't know the name of). I also made a black garlic aioli dip for the dish, which was pure umami goodness (less to do with me, more to do with how good of an ingredient black garlic is; Ooh check out this black garlic chocolate cookies by Posie Harwood btw!)
"Okonomiyaki"
Again, this wasn't an okonomiyaki per se. (Do you see the pattern now..? 😋) For this dish, I just took the flavours of a traditional Japanese pancake and worked it into a charred cabbage dish. I split a cabbage into eighths, and seared and basted them in kombu butter. There was also the typical okonomiyaki ingredients involved - Japanese mayo, smoky okonomiyaki sauce, scallions, and seaweed.
Kakigori
You know the drill now. This was not exactly kakigori, but a watermelon granita with some gin and cucumber agar jelly. Tbh, it might be slightly contentious to actually call this kakigori (tbh this whole menu is pretty contentious/heretical).
"Chawanmushi"
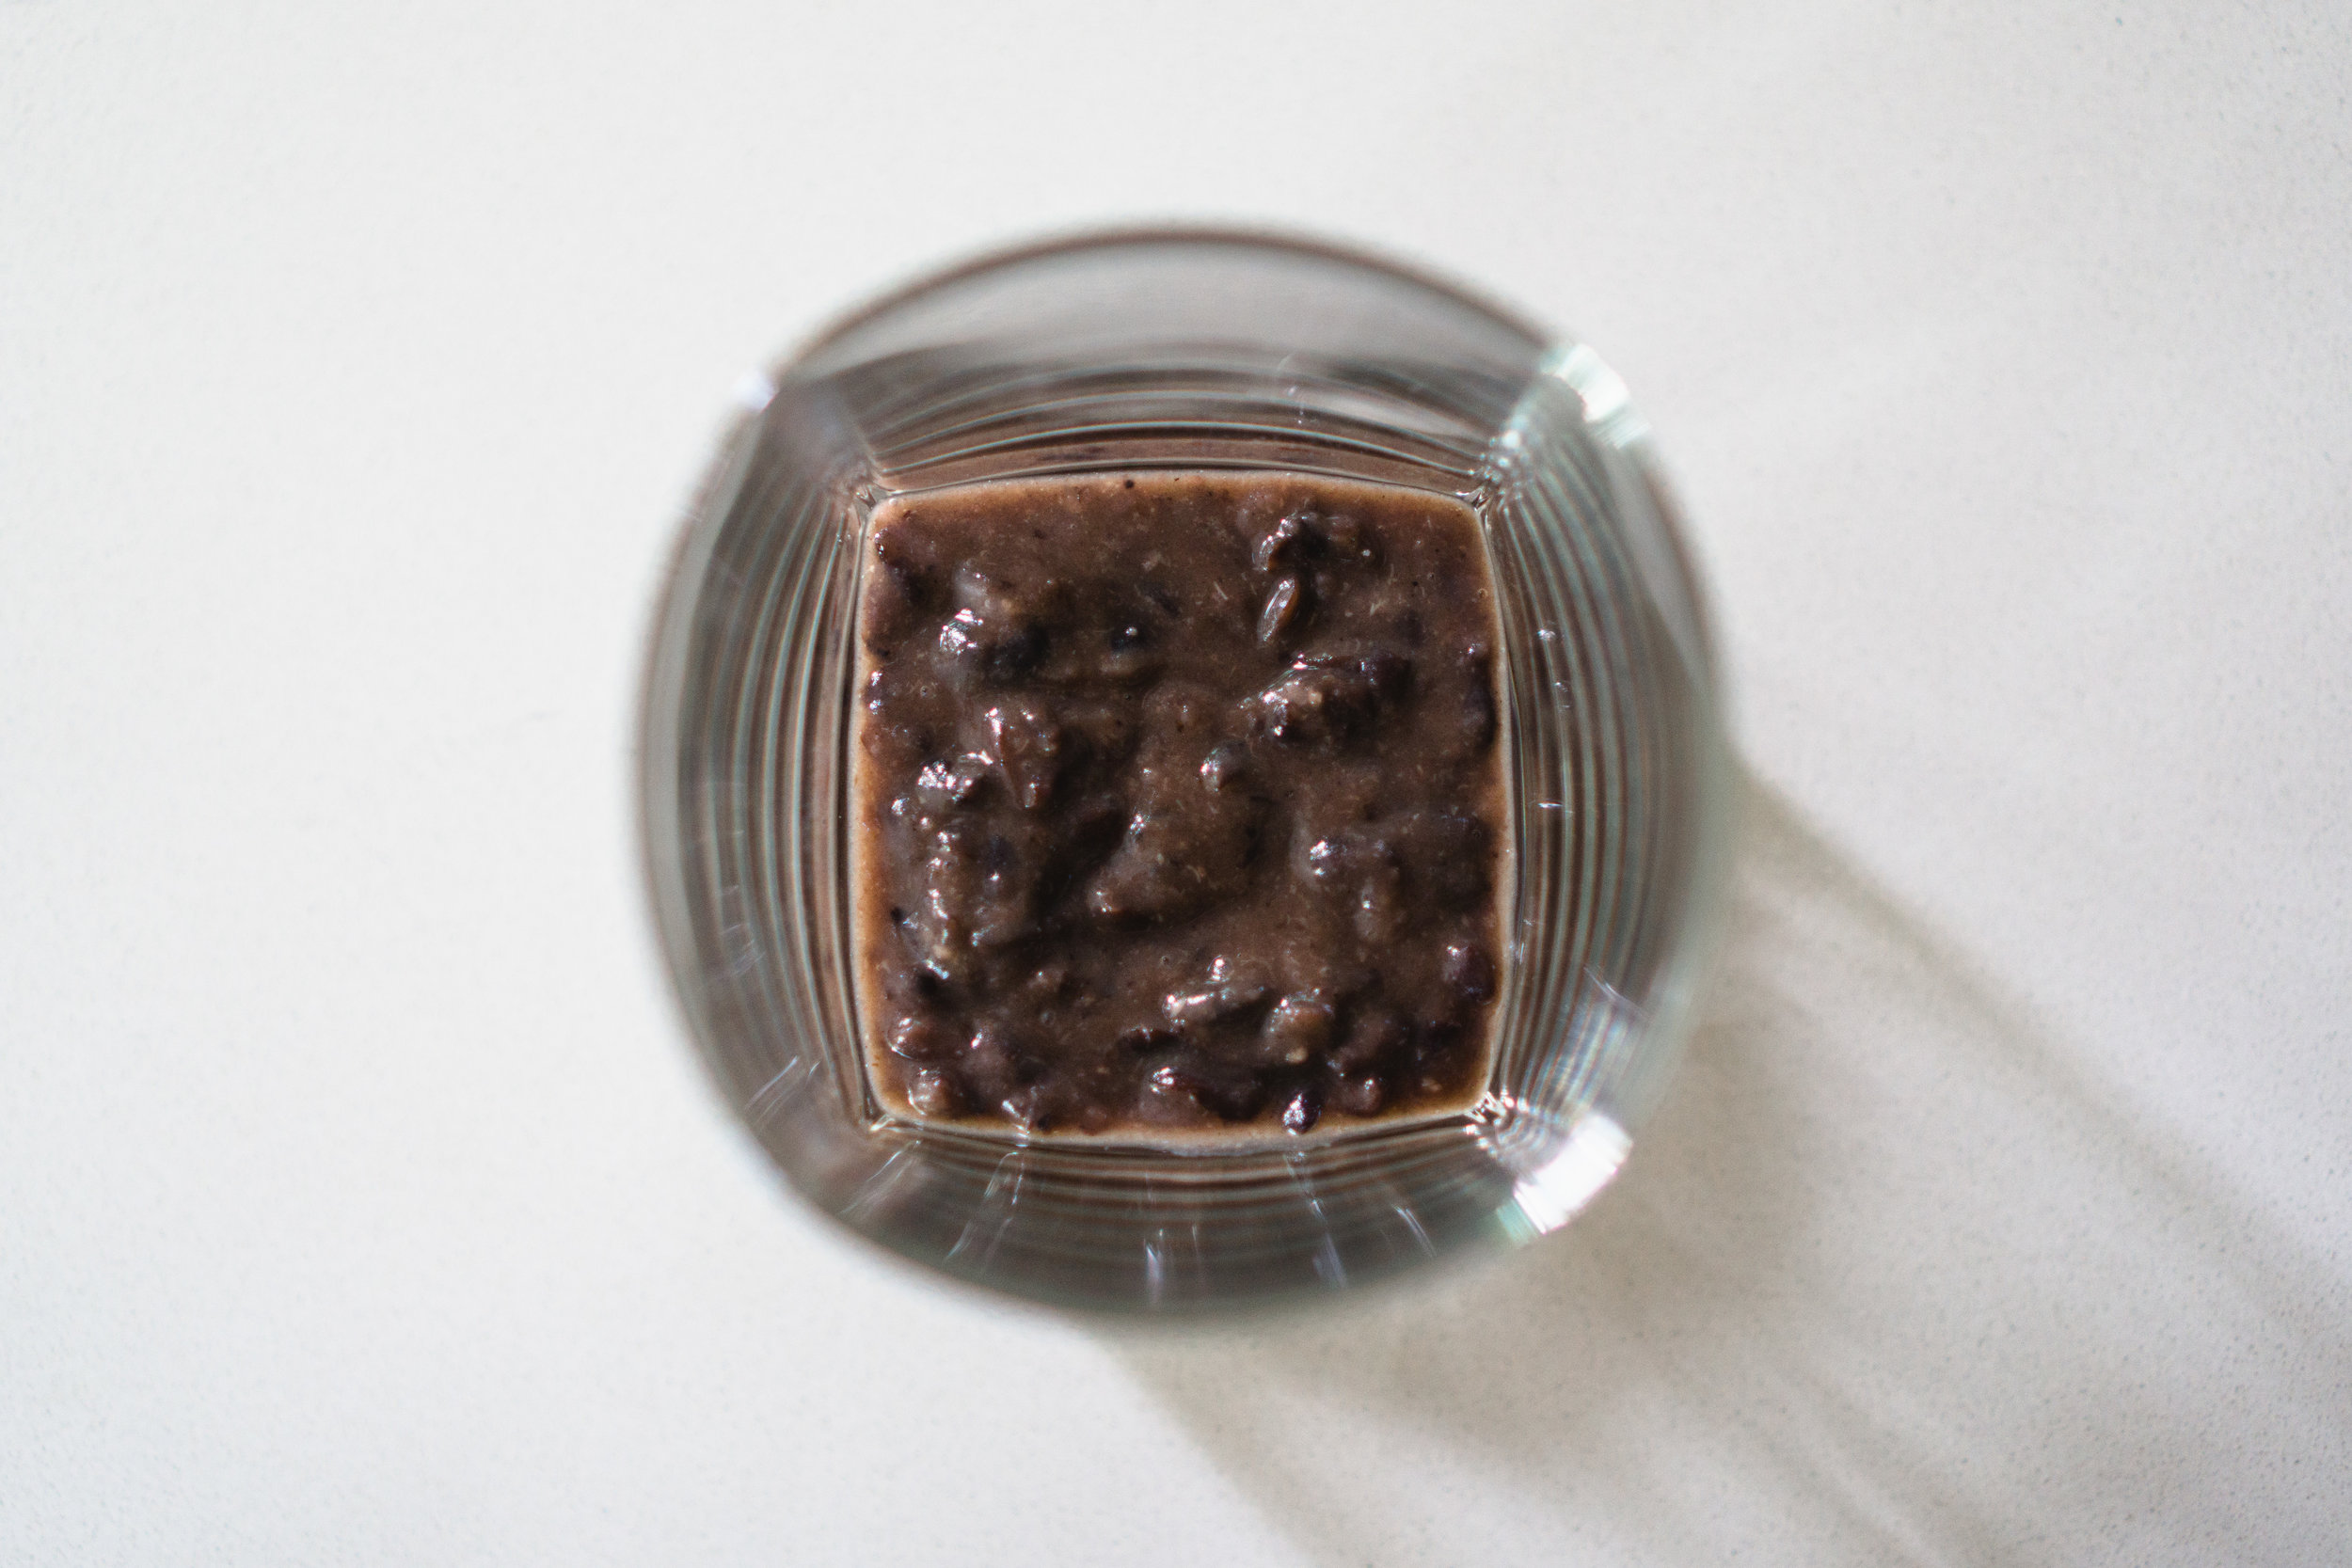
And finally, my favourite of the lot! The chawanmushi that isn't actually a chawanmushi. I started off with the idea of making a dessert that looked like a chawanmushi (savoury Japanese egg custard), but was in fact a pannacotta. (They have very similar textures, so the bluff is pretty convincing.) But then I thought, just to make it that bit more legit, I'll add some ikura / fish roe, which is sometimes used as a garnish on chawanmushi. Or should I say "ikura", because these were actually tapioca pearls dyed in a bit of orange & beetroot syrup! Ooh, and for the piece de resistance, I hid some red bean paste at the base of the cup, so that just so when you thought all the dish had was a bluff in name, out pops another surprise!
I admit I got quite amused coming up with this recipe, and I clearly got a bit carried away there with the concept, haha. Though from the photos, I agree that it doesn't look entirely convincing. The faux-ikura especially could be made more realistic. Also, serving it in a glass kinda gave away the surprise, so ideally it should be served in chawanmushi cups/mugs. (I did eventually serve these in green teacups you see in the photos below though, so it's all good.)
But for what its worth, I had plenty of fun creating and making this dish. Plus, the taste alone is more than reason enough to make it! It's no secret that I've always had a thing for red bean; It's gloriously comforting, like reading a good book by the fireplace on a cold winter's night. But little did I expect, when paired with creamy, rich panna cotta, not only was it just as hygge-inducing, it gave the red bean a deep sense of sophistication and sexiness. It's essentially like reading a good book by the fireplace, only now you're lying on the coziest futon taking sips of steamy hot cocoa, with your favourite woolly jumper on and a bit of slow jazz playing on the antique record player.
Sure, it's one of the longer recipes on the blog, but I think it's well worth the effort, if purely for the looks of confusion -> surprise -> bliss as your family and friends gorge on them. Priceless. This is why I cook. 😊


- - -
Adzuki Panna Cotta (a.k.a. "Chawanmushi")
makes 4-6 portions
Ingredients
Red bean paste
100g red beans
20g sugar
300g water
1 tbsp coconut milk
Panna cotta
15g (~4 teaspoons) gelatine powder
90ml milk, or water
500g cream
100g caster sugar, can be substituted for 50g caster sugar + 50g gula melaka
2 teaspoons of vanilla extract
“Ikura”
100g sugar
200g water
1 orange, shave off strips of peel (save them!), plus the juice too
1 knob of turmeric
½ a small beetroot, blended with ~1 tbsp of water then sifted to get the juice, alternatively use 2 tbsp ready beetroot juice
100g small sago / tapioca pearls
Directions
- Red bean paste: Soak the red bean in water for 2 hours, or up to 12 hours/overnight. After soaking, drain off the water and transfer the red bean to a pot. To this, add the sugar and water. Bring it to a boil and turn it down to a simmer for 45 minutes to an hour, until the beans are almost breaking apart and is a thick, pasty consistency. Stir in the coconut milk and let the red bean paste cool down.
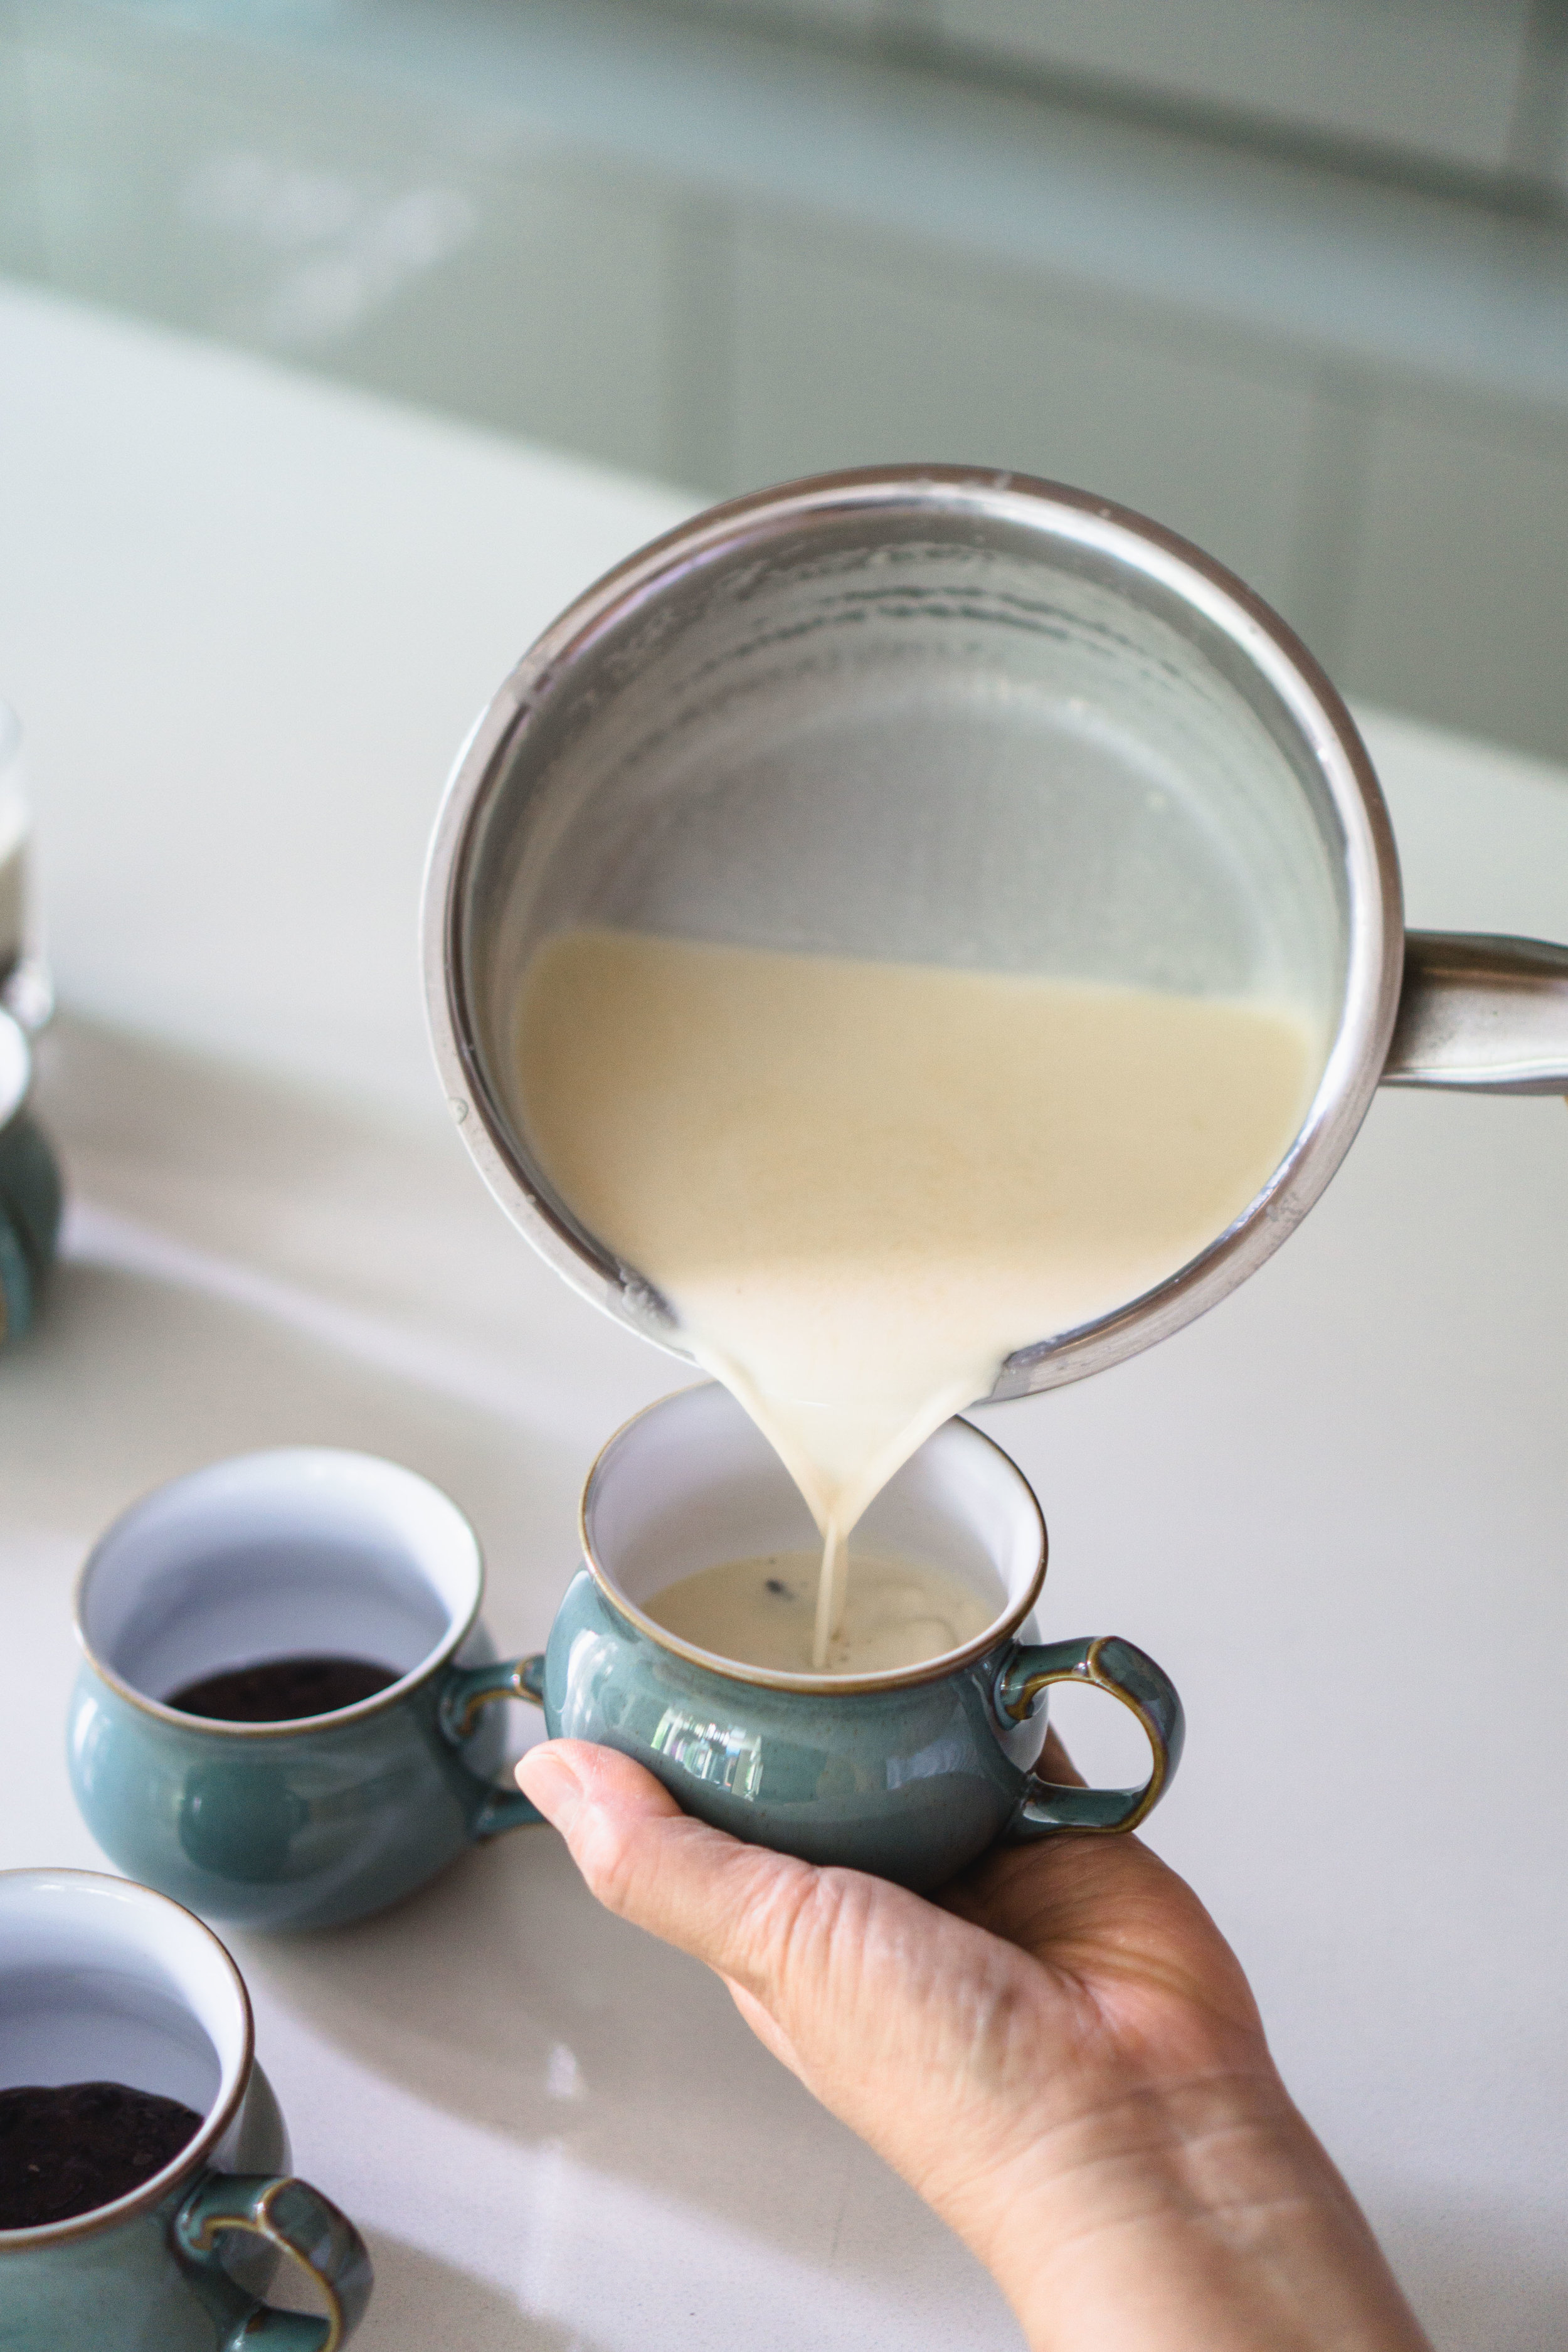
- Panna cotta: Sprinkle the gelatine powder into the milk (or water), and leave it for 5-10 minutes to bloom/hydrate. Meanwhile, add the cream, sugar, and vanilla essence in a saucepan, and heat until it starts to steam. Add the gelatine mixture into the cream, bring it to a quick boil and immediately turn it down. Stir until all the gelatine dissolves, take it off the heat, and let the mixture cool down slightly (you still want it to be warm, not cold).
- Assembly:Now you’re ready to assemble! Ready a few small teacups/glasses. (Depending on the size of you cups/glasses, this recipe should yield 4-6 portions.) Place 40-50g (~3 tablespoons) of the red bean paste into the bottom of the cups. Tap the cups on a flat surface to level off the red bean paste. Then, pour the panna cotta mixture into the cups/glasses until about ¾ full. (If the panna cotta mixture has formed a skin as it was cooling in the saucepan, pour it through a sieve into the cups.)
- Setting: Then, place plastic wrap over the top of the cups, and let the panna cotta set in the fridge for at least 3 hours so that it fully sets.
- “Ikura” soaking syrup: In a saucepan, add the sugar, water, orange juice, orange peel, knob of turmeric, and beetroot juice. Bring to a boil, making sure the sugar dissolves fully, and let it simmer for 10-15 minutes for the flavours and colour to really meld together. You should have a deep orange (pinkish, even) liquid. Strain the liquid, and discard all the aromatic bits. Let the liquid cool to room temperature before transferring them to a small container.
- "Ikura": Fill a separate medium pot two-thirds full with water, and bring to a rolling boil. Add in the tapioca pearls and stir continuously, maintaining that rolling boil. Let it cook this way for roughly 10 minutes, until the pearls turn translucent all the way through. Sift out the tapioca pearls, and immediately wash with running cold water (or plunge in an ice bath). Transfer the tapioca pearls into the orange syrup and let it chill in the fridge (literally) for at least a day, or up to 5 days.
- Serve: Scoop out a teaspoon of faux-ikura, sans liquid, and place on top on the panna cotta. Be real tricksy and serve it as chawanmushi. ;)